Create GitHub App
GitHub application forms the bridge between ReviewNB and GitHub. It enables user authentication via Oauth2 & let user select repositories that ReviewNB should have access to.
In this section, we’ll create a GitHub app for your self hosted ReviewNB installation. By the end, we should have following values noted down:
App ID
App URL
Client ID
Client secret
Private Key
Note
Throughout this document when we say GitHub account, it can be an individual/org account on github.com or your own GitHub enterprise installation, depending on the GitHub offering you are using.
Prerequisite
You need to decide the endpoint at which you’ll be running ReviewNB. It’s typically reviewnb.<your-domain-name>.com. Your application won’t be running there as yet but you just need to know the endpoint you’ll be using.
Warning
For integrating with GitHub Enterprise Server (GHE), the top level domain for ReviewNB must be same as the top level GHE domain. E.g. If you’re GHE is running on github.prod.company.com then ReviewNB should also run at .company.com endpoint.
Create New App
Any GitHub account can own the app but we recommend creating it under org account of the team who is going to maintain the ReviewNB installation.
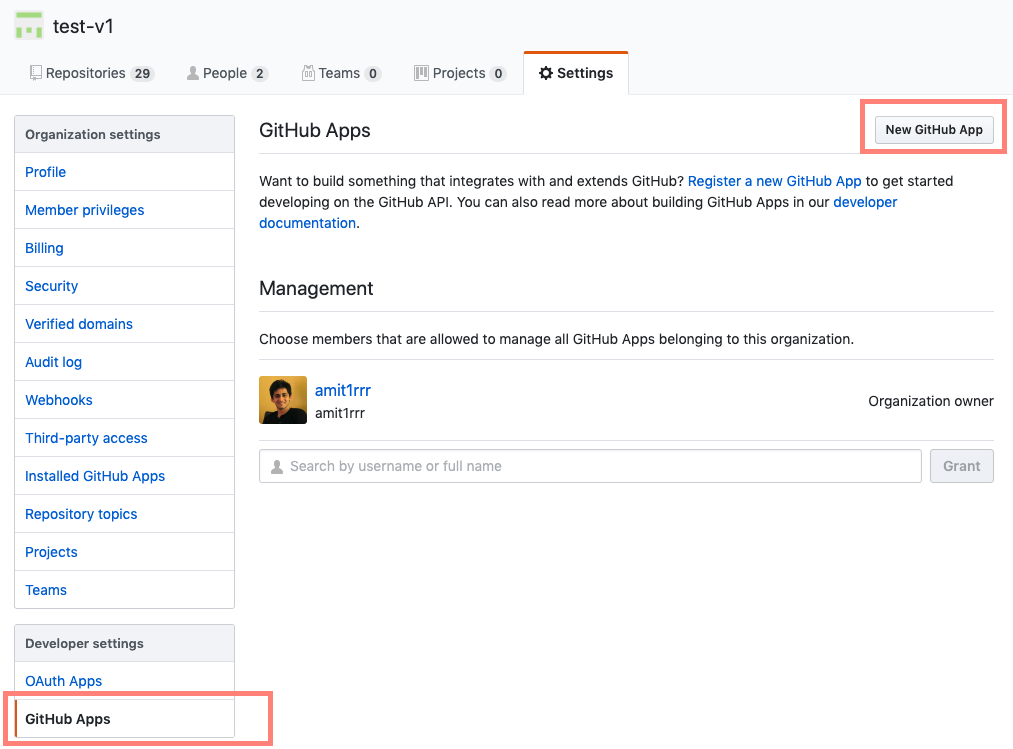
Login to GitHub & go to your org account page (e.g. https://github.corp.company.com/tools-org).
Click on Settings -> GitHub Apps -> New GitHub App as shown below.
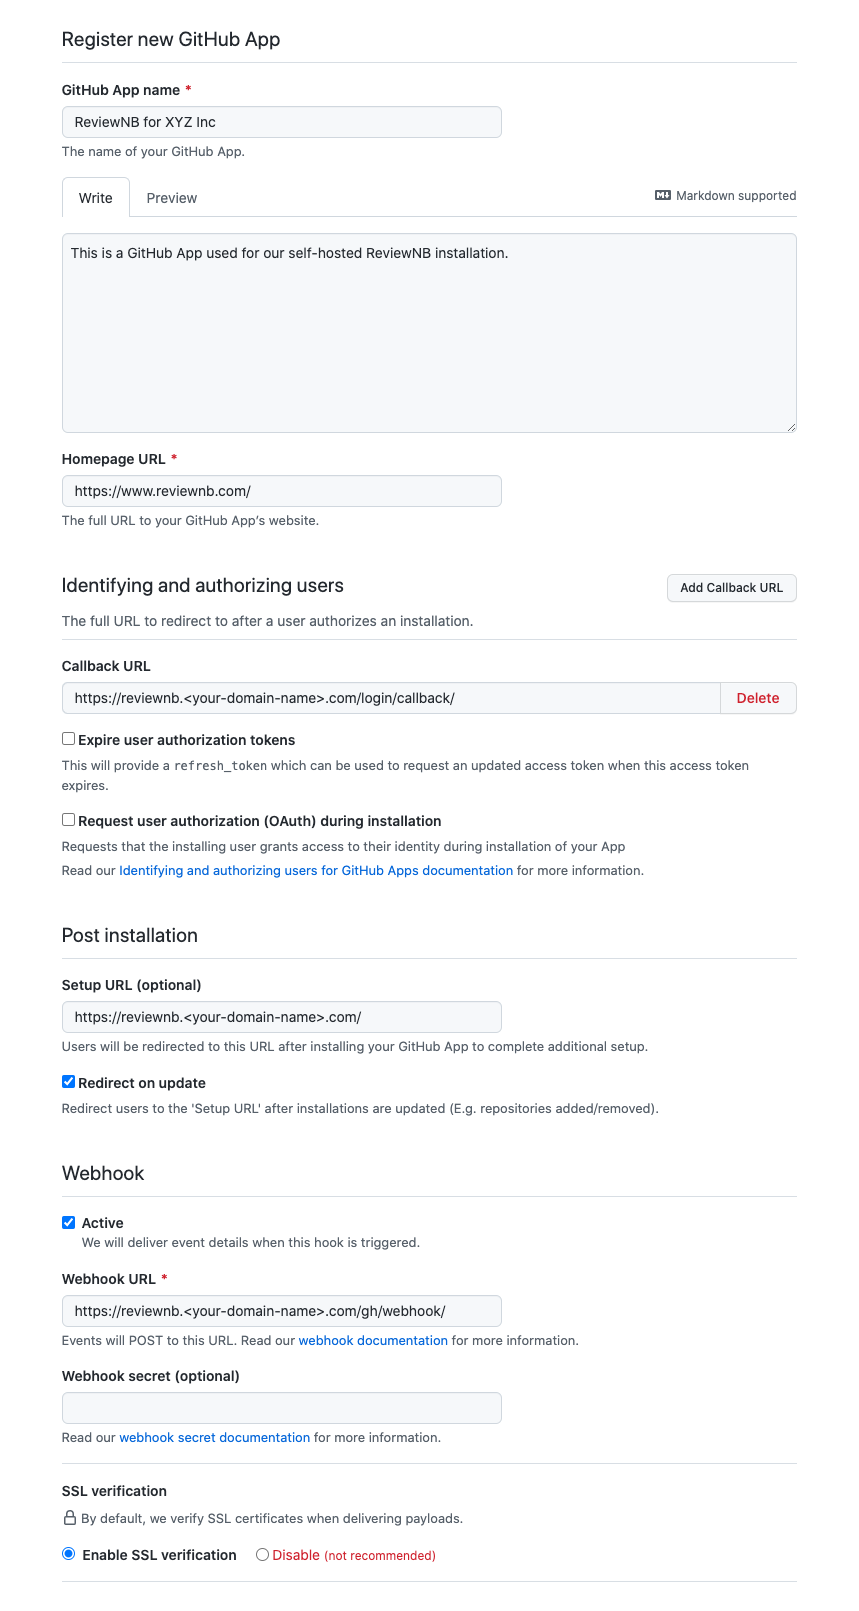
Setup URLs and General Information
Fill in the app information as shown in the screenshot below. For URLs, replace reviewnb.<your-domain-name>.com with actual endpoint at which you’ll be hosting ReviewNB application.
Warning
Do not forget trailing slashes for the URLs.
Warning
Do not forget to disable “Expire user authorization tokens” checkbox.
Setup Permissions
We need following permissions for enabling all the ReviewNB functionality,
Read repository contents to fetch notebooks and compute diff
Read repository metadata to fetch list of commits and PRs
Read-Write access to pull requests to read & write PR comments
Read access to emails for user profiles (older GitHub Enterprise versions might not have email permission, please contact support@reviewnb.com in such cases)
You need to enable these under permissions section as shown below,


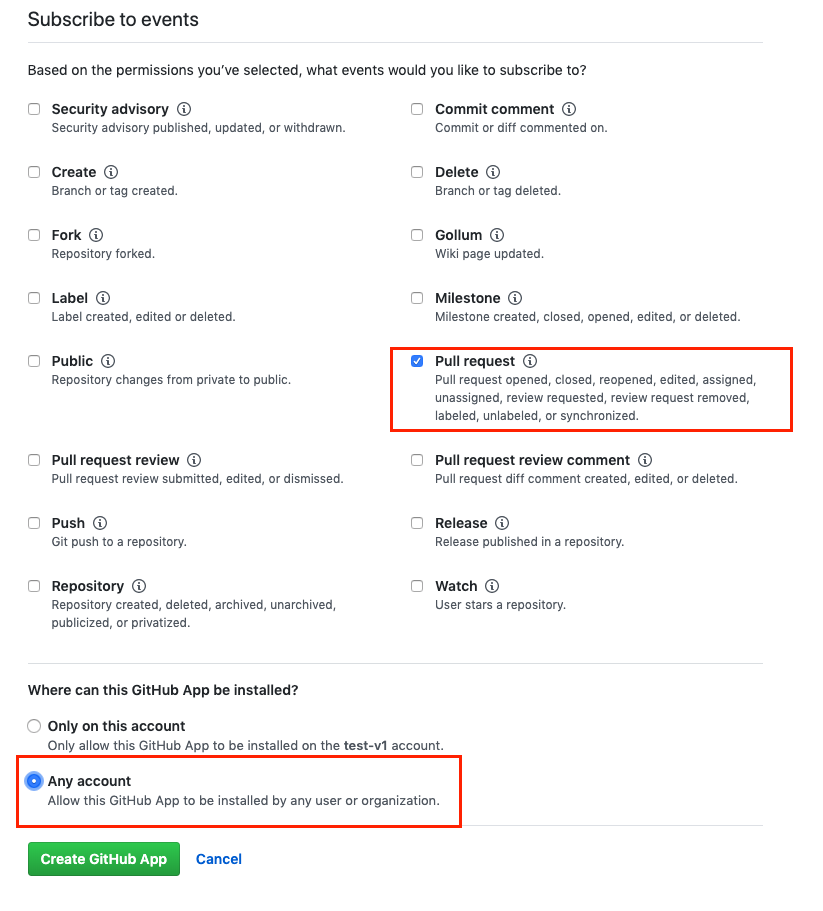
Webhook Events & Scope
Subscribe to Pull Request events so ReviewNB is notified when a PR is created and it can post the ReviewNB link on the PR discussion.
For the question, “Where can this GitHub App be installed?” choose “Any account” so other orgs in your company can use ReviewNB as well. For on-prem installations that work with github.com, only repositories under your company’s org account can be accessed via ReviewNB.
Click on Create GitHub App
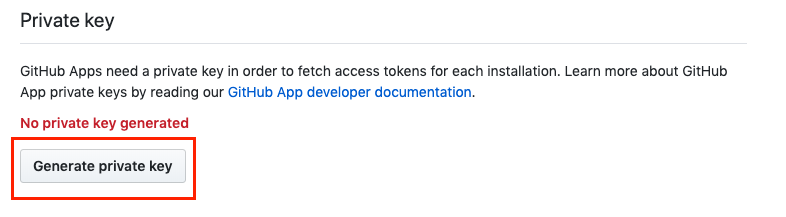
Generate Private Key
Once the app is created you can scroll down and click Generate private key. This will create and download a .pem file for you. Please keep this safe.
Get App Config
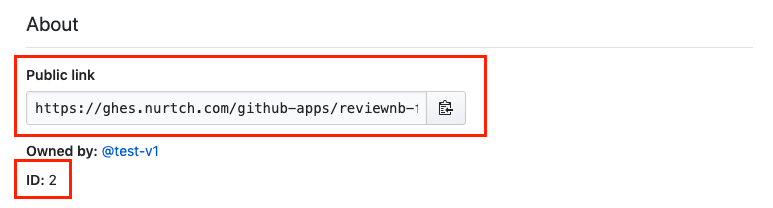
On your newly created app page, you can find Client ID, Client Secret, App ID, and App URL. Please note down these fields along with the private key generated in the above step. We’ll need to plug them as environment vaiables on the docker container.

Public link is the App URL and ID is App ID.
How to read Private Key
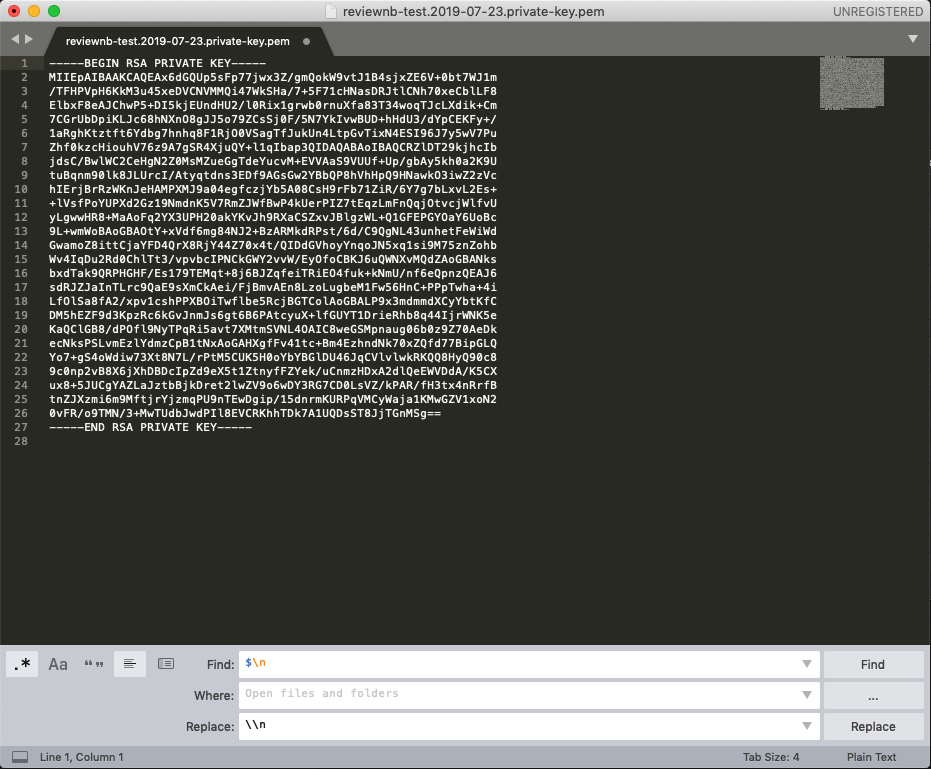
The private key you generated above would be downloaded as a .pem file. You need to open the .pem in any text editor and replace the newlines with \n. I demonstrate this with Sublime Text below. Notice the regex replacement I’m using at the bottom. If your editor doesn’t support it, you can manually replace newlines with \n.
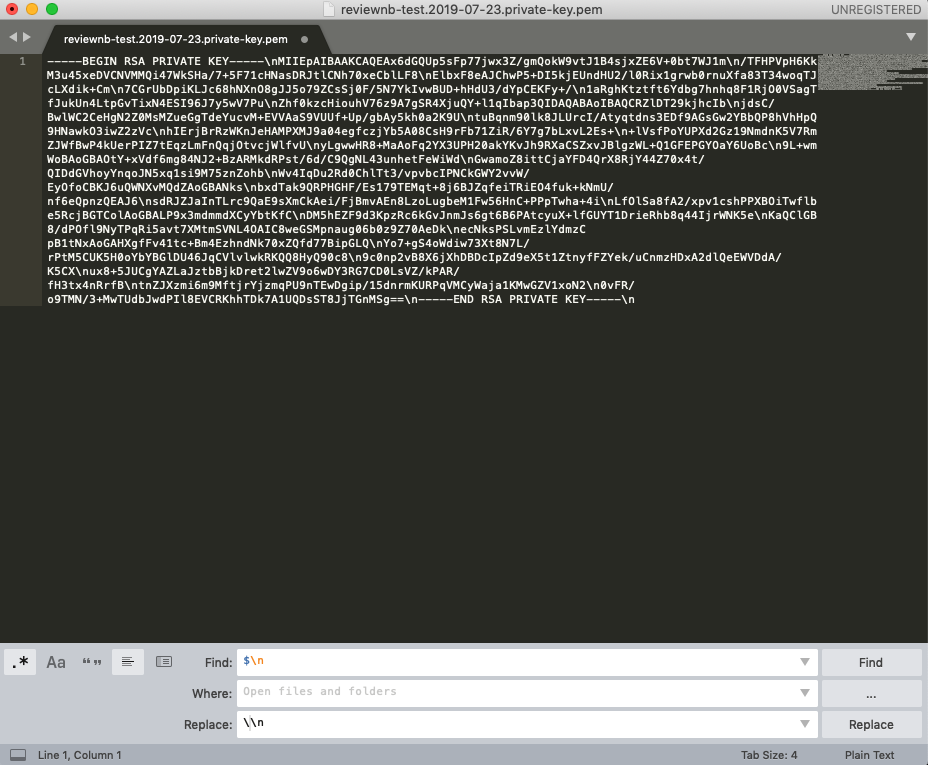
After replacement, it should become a single line (as shown below) with \n between each of the previous line. If you’re replacing by hand, notice there’s a \n at the end of last line as well. This entire single line will be your Private Key (GITHUB_APP_PEM).
Summary
At the end of this section you should have following values to be used as environment variables for ReviewNB container.
App ID (GITHUB_APP_ID)
App URL (GITHUB_APP_URL)
Client ID (GITHUB_CLIENT_ID)
Private Key (GITHUB_APP_PEM)
Client secret (GITHUB_CLIENT_SECRET)